If you’re interested in building your own knife sheath, you should consider using a beaver tail. This can be a good way to make a sheath that’s unique and will stand out in a crowd.
A beaver tail is an excellent choice for making a sheath because it’s very strong and doesn’t require much attention.
1. Cut the tail in half.
Beaver tail is an excellent choice for making a knife sheath because it’s easy to work with and it makes a great conversation piece. It also adds a touch of authenticity to your reenactment gear or living history village.
When you’re ready to skin the beaver, make one cut across the pelt from the base of the tail up toward the head. You can do this by pulling the pelt back and forth, or you can hold it between your thumb and index finger and roll it downward.
After you’ve skinned the beaver, boil it over a fire until the outer black skin bubbles and dries. Once the flesh has cooked through, peel off the charred skin and enjoy the delicious greasy goodness.
2. Make a slit in the middle.
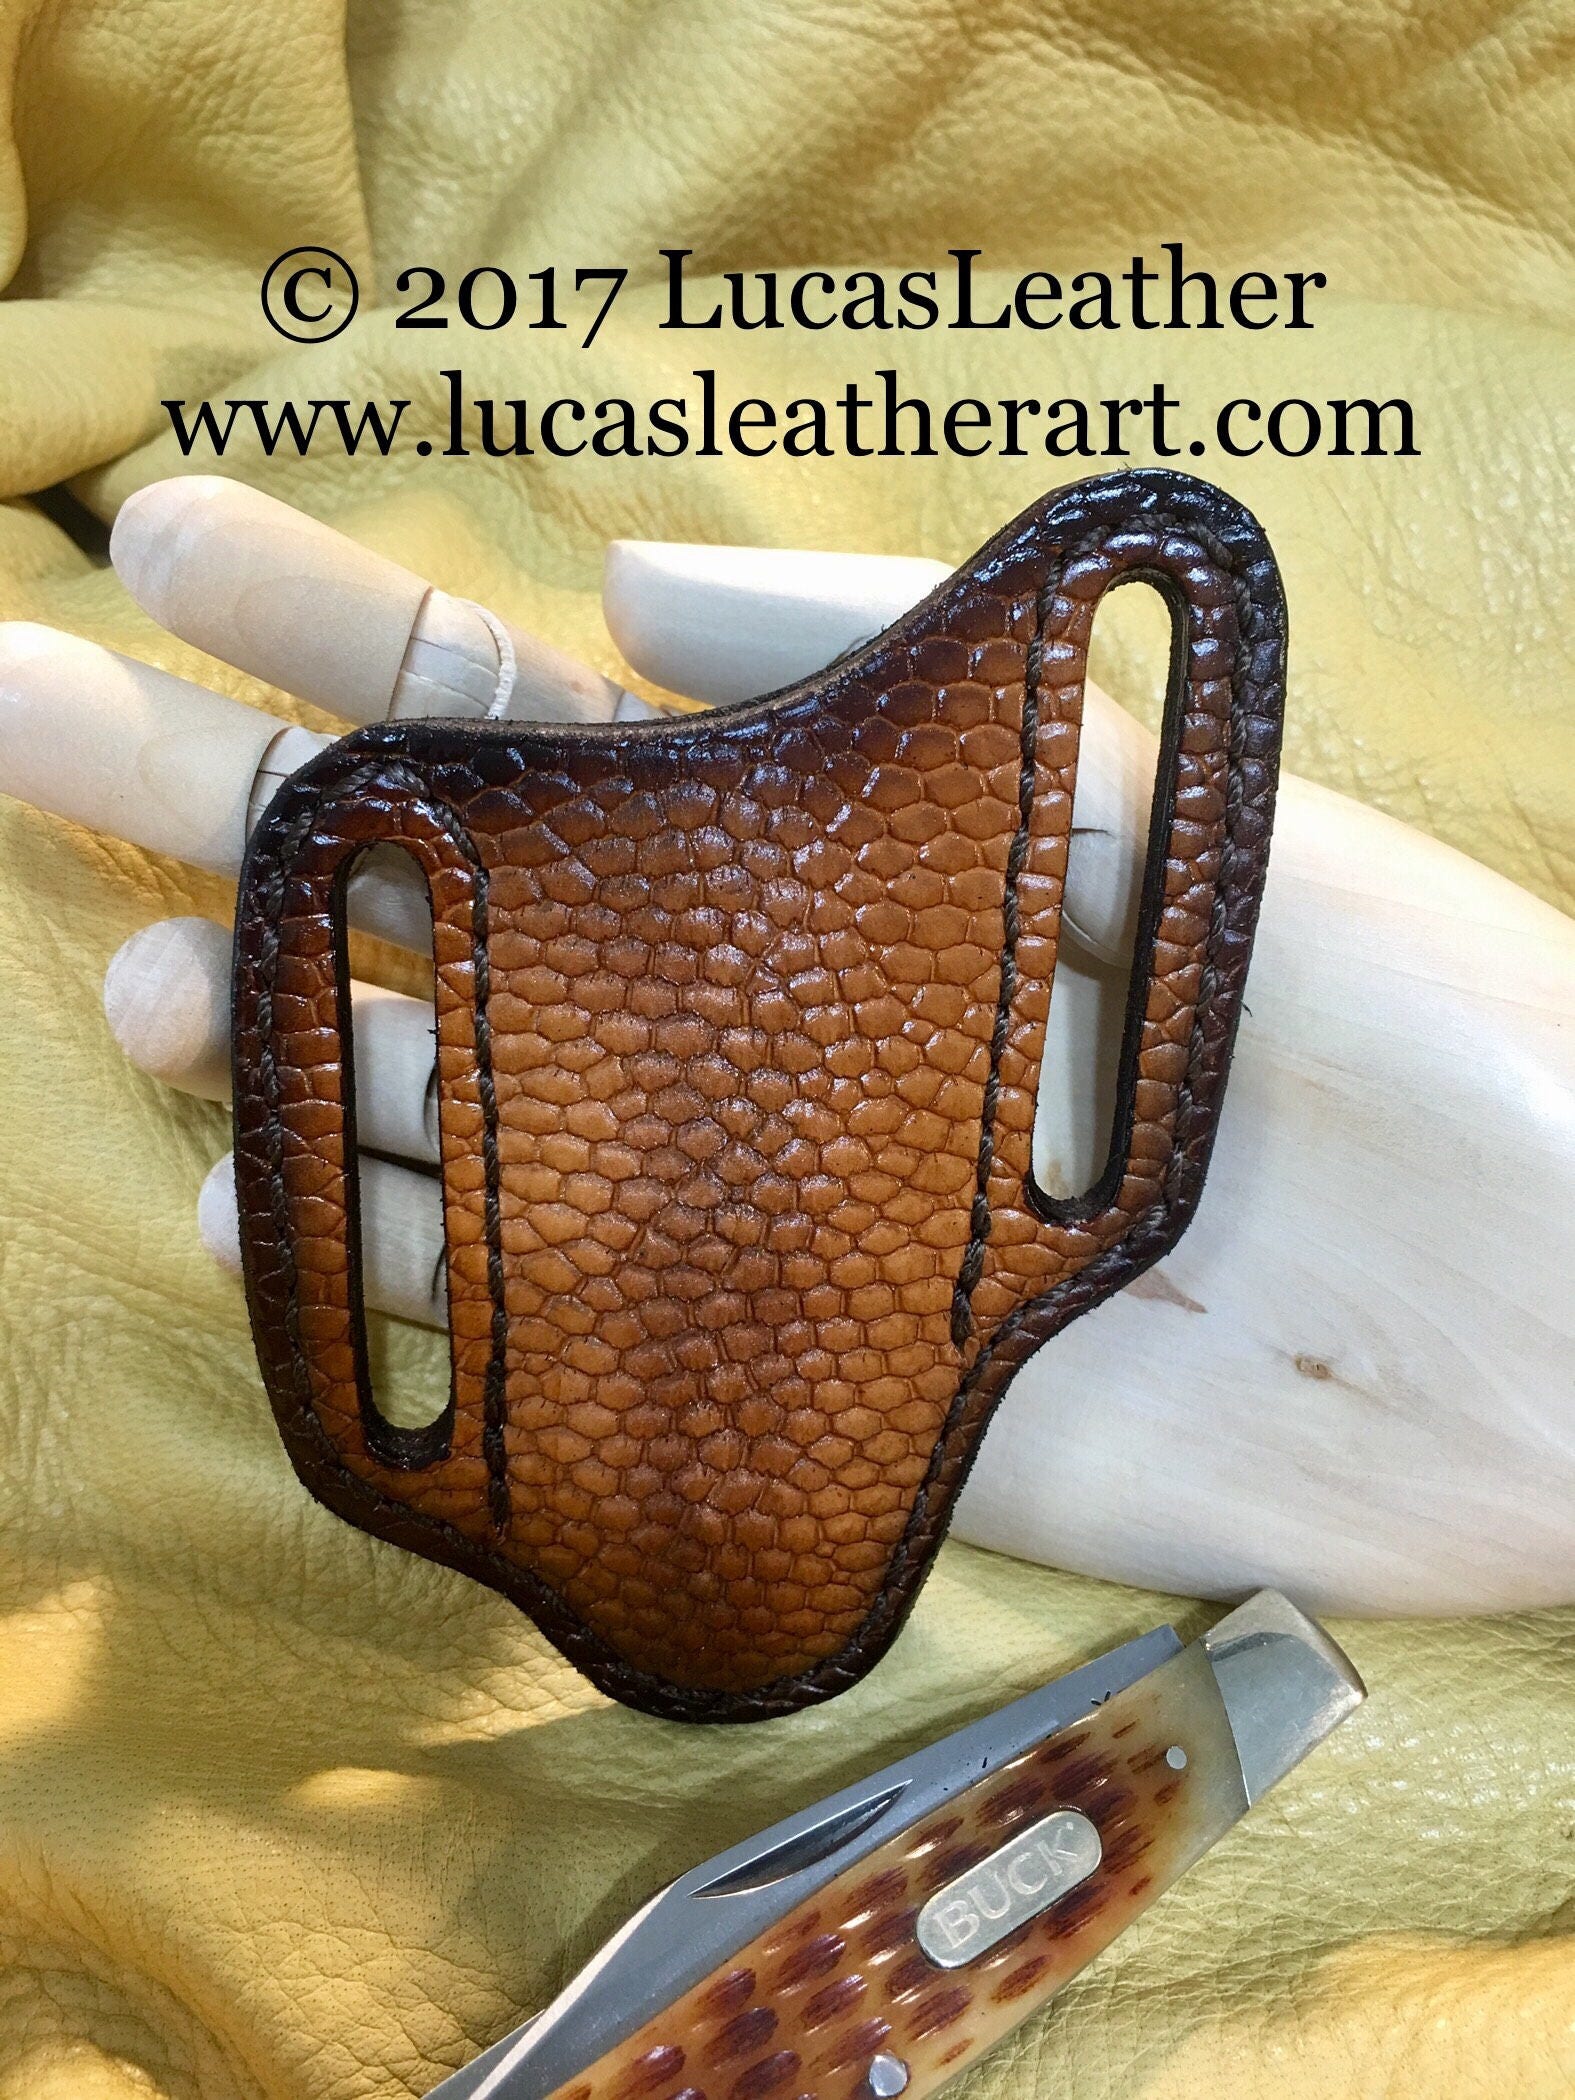
Beaver tail leather is a very durable, stiff, and water-resistant leather that has a unique texture. It is perfect for sheaths, watch bands, holsters, and wallets, among other small leather accessories.
It is a vegetable tanned, natural leather. This type of tanning removes correcting top coats that make it more durable and stronger, while retaining the character of the animal’s skin.
It can be used for many projects, but it can also be very difficult to work with as it is extremely thick and has a wide range of scales. You will need to plan your project and be careful as it can be slippery.
3. Make a notch in the slit.
A beaver tail makes a fun novelty tie for a rendezvous or dress up event. It is also a great material for making a knife sheath!
Notching a slit in a beaver tail is not difficult, but it can be intimidating for a beginner. It’s important to exercise caution when marking notches and not to accidentally cut through the seam allowance.
Notches are triangular shaped wedges or plain slashes added at specified locations along the seam allowance edge. These provide an important guideline for matching up corresponding seams and edges in the sewing process.
4. Make a notch in the notch.
If you want to make sure that the two pieces of wood fit together perfectly, you need to notch them. This will help you create a strong wood joint that will last long.
To do this, you can use a bench drill and a Forstner bit. First, install a rip fence on the table and set the drill depth stop to its appropriate level.
Next, drill overlapping holes along the notch. This will create a rough line that you can remove blemishes from using a chisel and file.
The exact size and depth of the notch should be determined carefully by the type of wood and the load that the framework is carrying. This is especially important in cases where larger frameworks put pressure on one another and need extra care to maintain their structure.
5. Make a notch in the notch.
If you need to make a notch in your beaver tail, there are several ways to do so. You can use a circular saw, a mechanical router, or even a traditional hammer and chisel.
You can also cut notches in wood using a jigsaw. First, mark the end of the piece of wood for the notch and then use the jigsaw to cut it out.
Once you have done that, sand the edges to smooth them out. This will help your finished product look better.
Next, you can use a sharp chisel to remove the bits of waste that were left between the holes when you drilled them. Once the chisel is all gone, sand the notch with sandpaper until it is completely smooth.